LivaChat Laravel LiveChat Application
Tickets
- Create Tickets
- All Tickets
- Unassigend Tickets
- My Tickets
- My solved Tickets
- Trashed Tickets
- Ticket Settings
- Create Ticket :
Navigate to the
Admin Panel->Tickets->Create TicketsWhen an administrator initiates the creation of a new ticket, a pop-up modal window is displayed. - All Tickets :
Navigate to the
Admin Panel->Tickets->All TicketsIn this "All Tickets" page, the total tickets with different types of status like New, Inprogress, Overdue, Closed, and Assigned tickets are displayed in this page. - Unassigned Tickets :
Navigate to the
Admin Panel->Tickets->Unassigned TicketsIn this "Unassigned Tickets" page, only "Unassigend Tickets,"are displayed.Tickets that have not yet been assigned to either administrators or employees. When creating a ticket, if the 'Assignee' field is set to 'Unassigned,' the ticket will be categorized under 'Unassigned Tickets. - My Tickets :
Navigate to the
Admin Panel->Tickets->My TicketsIn this "My Tickets" page, only those tickets are displayed that are assigned by the superadmin to employees or tickets assigned by employee’s themselves - My solved Tickets :
Navigate to the
Admin Panel->Tickets->My solved TicketsAll globally solved tickets are displayed in this "My Solved Tickets" page. Those are the tickets that are solved by employees or superadmin. - Trashed Tickets :
Navigate to the
Admin Panel->Tickets->Trashed TicketsIn this page, globally "Trashed tickets" are displayed. when they are deleted by administrators or employees. This status indicates that the tickets have been removed from active queues and are now stored in a deleted state - Ticket Settings:
-
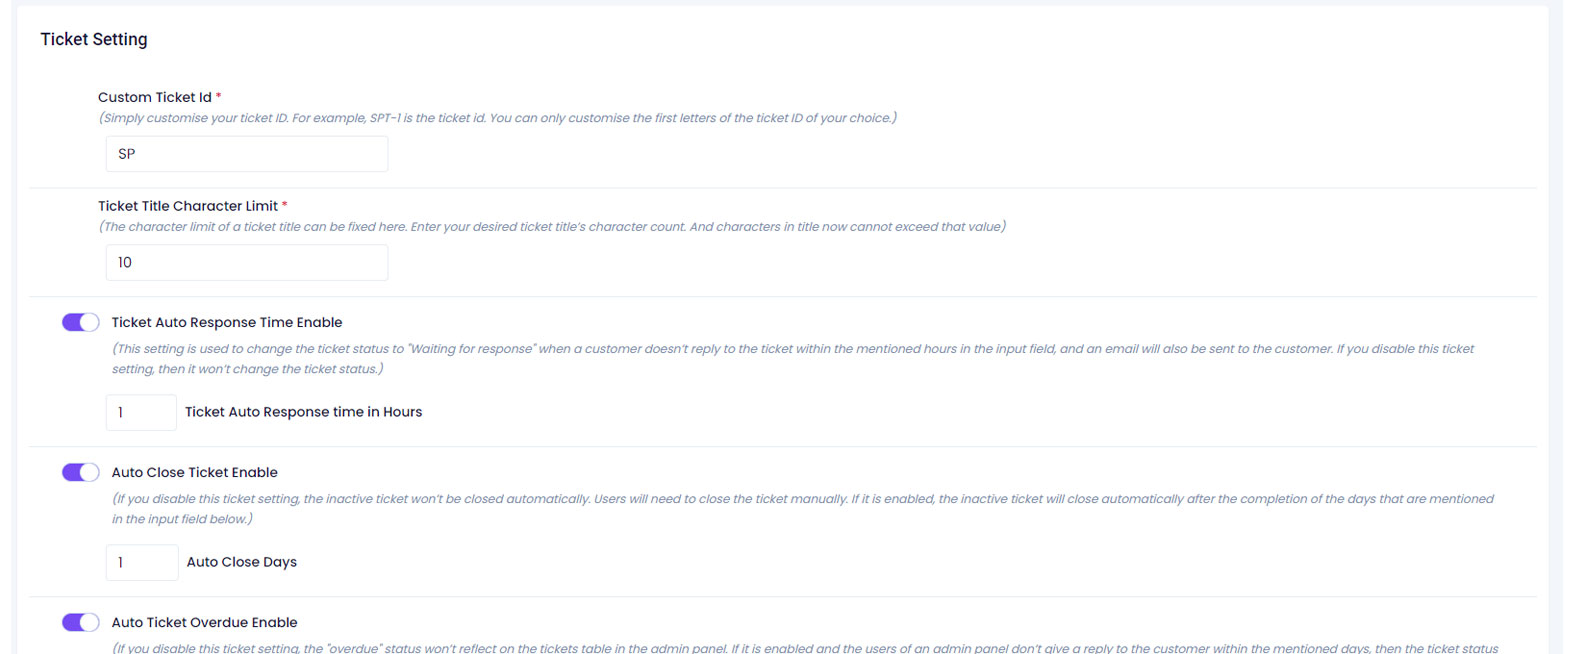
Ticket Settings : Navigate to
Admin panel->Tickets->Ticket SettingsPlease select options to control the ticket settings. Or else, you can also refer to the particular "Ticket Settings" page to get an overview of the ticket settings, example as shown in the below image. -
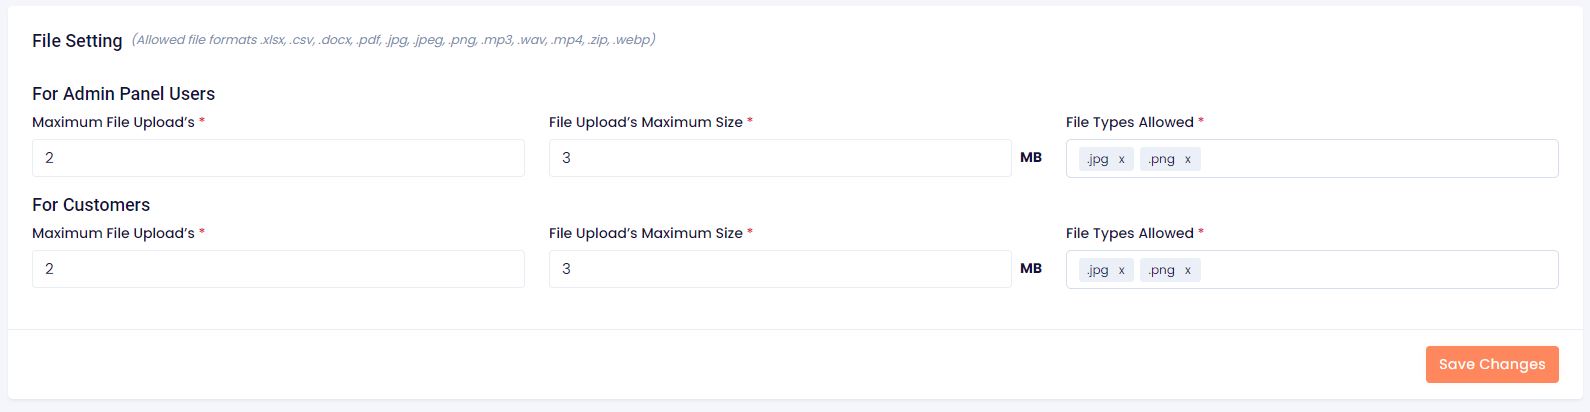
File settings : Navigate to
Admin panel->Tickets->Ticket SettingsThe "superadmin" or any other “employee” who has permission to access the admin panel can control the file size and file type that will be uploaded to the tickets or articles by users.Here, the superadmin or permitted employee can set the maximum files to be uploaded by users for tickets or articles. For example, if the "Max File Upload" option is set to 2 in the input fields by the admin, then the users can only upload a maximum of 2 images or files.
Here, the superadmin or permitted employee can set the maximum file size to be uploaded by users for tickets or articles. For example, if the file is set to 3MB by the admin, then the users can only upload images or files up to 3MB.
Here, the superadmin or permitted employee can set the file types to be uploaded by users for tickets or articles. For example, if the file type is set as .jpg or.png by the superadmin, then the users can only upload those types of images or files.
-
Note :Please click on the “Save Changes” button after setting up your file settings.
How to setup ticket settings?
How to setup file settings?
Ticket Overview
Delete Ticket : This option allows you to permanently remove the ticket.
Ticket Information Section
This section provides detailed information about the user's ticket. It includes the title, date and time, category, priority,
Assign : The Assign Activity Section is designed to enhance ticket management and accountability.Administrators are responsible for assigning tasks to employees, who may also assign tasks to themselves.
-
Status :
Choose the appropriate status for the ticket, indicating its current state:
-
In Progress : choose this when you're actively working on resolving the ticket.
Solved : choose this when you want to close the ticket, when 'Solved' is selected, click enter ( This button becomes accessible only when the "Rating Page Disable" setting in the ticket settings is disabled. )
Note : Here, administrators or agents can document essential notes and information pertaining to the ticket. This card allows you to maintain an organized record of discussions, updates, and actions taken in relation to the ticket
-
Customer Info Section
This section concentrates on user-specific details, such as IP address, mobile number, country, time zone, and ticket history.
File Upload Permission
The 'File Upload Permission' toggle switch controls file upload capabilities for clients. Attach multiple files within the specified size limit to provide supporting documentation or additional resources to resolve the user's concerns. if a customer attempts to upload a file exceeding the specified size limit, they will receive an email notification regarding the attachment size.
How to reply the ticket
Canned Responses : Access pre-defined messages to swiftly address common queries or issues, ensuring consistent and efficient responses.
Upload : Attach multiple files within the specified size limit to provide supporting documentation or additional resources to resolve the user's concerns.